Pizza Dough Recipe: A No-Fail Guide for Home Ovens
- What actually makes pizza dough fail (it's not the recipe)
- My go-to pizza dough recipe (with exact grams)
- Step-by-step: how to make the dough without a stand mixer
- Hydration levels compared — and which one to pick
- The proofing mistakes even seasoned bakers miss
- Common questions (and non-obvious answers)
I’ve been making pizza dough at home for about ten years now. In that time I’ve ruined more batches than I’d like to admit — dense hockey pucks, sticky messes that glued to my hands, crusts that tasted like raw flour. The breakthrough came when I stopped chasing “the perfect pizza dough recipe” and started understanding why certain ratios and techniques work. That’s what this guide is about.
Below you’ll find the exact formula I use for a pizza dough recipe that produces a crisp-bottomed, airy-crumbed crust in a normal home oven. No pizza stone required (though it helps). No fancy flour (bread flour is fine). And I’ll point out the subtle errors I see in most online recipes — the ones that quietly sabotage your pie.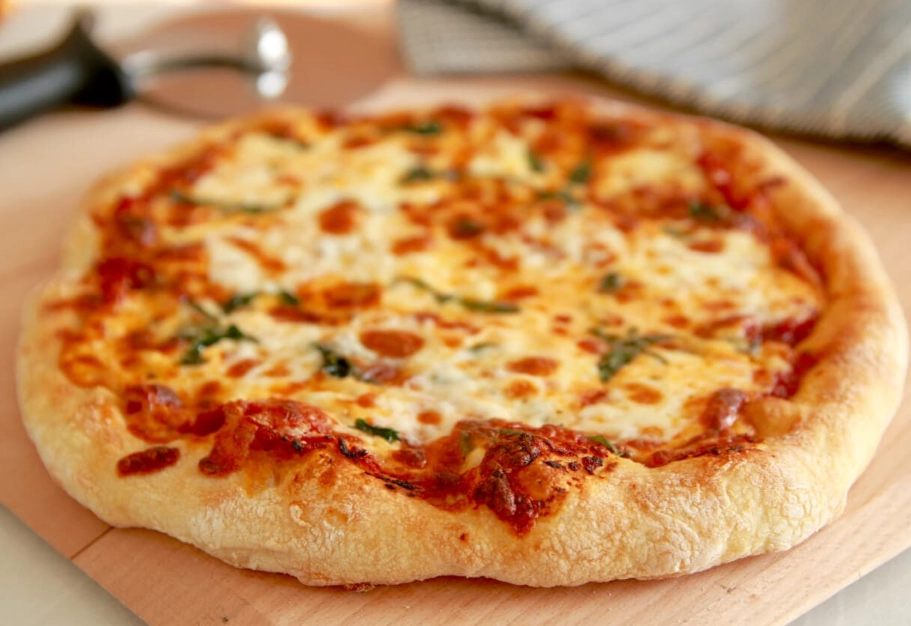
What actually makes pizza dough fail (it's not the recipe)
Most people think their dough recipe is wrong. Nine times out of ten, it’s not. The problem is temperature, timing, or hydration misunderstanding.
Here’s a non-consensus take: many popular pizza dough recipes on the internet call for too much yeast and too short a fermentation. They’re trying to give you “pizza in 90 minutes.” That works in a pinch, but the flavor is flat and the texture tends toward bready rather than pizza-like. A slow rise in the fridge (24 to 72 hours) does more for flavor than any special ingredient. I’ve tested side by side: same flour, same hydration, one fermented for 2 hours at room temp, another for 48 hours cold. The cold-fermented version had a nutty, almost sourdough-adjacent depth that the quick version completely lacked.
Another culprit: over-flouring the bench. When you dust with cups of flour during shaping, you work raw flour into the dough. That flour doesn’t hydrate properly and creates dry, tough patches. I keep a small bowl of flour and use maybe a tablespoon total for two dough balls.
My go-to pizza dough recipe (with exact grams)
This formula makes two 250g dough balls — enough for two 10-to-12-inch thin-crust pizzas. I usually double it for a family dinner.
| Ingredient | Weight (g) | Baker's % | Notes |
|---|---|---|---|
| Bread flour (or 00 flour) | 320 | 100% | Protein 11.5–12.5% |
| Water (cool, ~18°C) | 198 | 62% | Filtered if tap is chlorinated |
| Fine sea salt | 8 | 2.5% | Not flaky salt |
| Instant dry yeast | 1.6 | 0.5% | About ½ teaspoon |
Notice there’s no oil and no sugar. Those are optional. Oil makes the crust slightly more tender but reduces oven spring. Sugar accelerates browning but can cause burning in a home oven. For a classic Neapolitan-ish result, I leave them out. If you want a slightly softer, American-style crust, add 10g olive oil.
One more thing: the flour matters less than you think. I’ve made great dough with standard supermarket bread flour. 00 flour gives a silkier texture, but it’s not a dealbreaker. What matters most is protein content and a slow ferment.
Step-by-step: how to make the dough without a stand mixer
You don’t need a machine. I’ve made this recipe by hand in a regular mixing bowl dozens of times.
1. Dissolve salt and yeast in water — separately
Pour the water into a large bowl. Add the salt and stir until dissolved. In a separate small cup, sprinkle the yeast over a few tablespoons of the salted water and let it sit for 5 minutes. Why separate? Salt can inhibit yeast if they sit directly together in high concentration. This little step prevents that. Many recipes skip it; I notice a more consistent rise when I do it.
2. Mix flour into the water
Add the flour all at once. Stir with a sturdy spoon or your hand until no dry flour remains. The dough will look shaggy and sticky. That’s correct for 62% hydration.
3. Rest, then slap and fold
Cover the bowl and let it sit for 20 minutes. This autolyse rest hydrates the flour and makes kneading easier. After the rest, wet your hand and perform a series of slap-and-folds: lift the dough from one side, stretch it up, and fold it over itself. Rotate the bowl 90 degrees and repeat. Do about 8 folds total. The dough will tighten up. Cover and rest another 20 minutes.
4. Bulk ferment in the fridge
Shape the dough into a rough ball. Place it in a lightly oiled container with a lid (or a bowl covered tightly with plastic wrap). Put it in the fridge for at least 24 hours, up to 72. I usually aim for 48. The dough should roughly double in volume and develop small bubbles on the surface.
5. Divide and ball
Take the dough out of the fridge. Divide it into two equal pieces (about 250g each). Shape each into a tight ball by dragging it against the counter in a circular motion. Place the balls on a floured tray, cover, and let them come to room temperature for 1 to 2 hours before stretching.
6. Stretch and bake
Preheat your oven as high as it goes (usually 250–280°C / 480–535°F) with a pizza stone or an inverted baking steel for at least 45 minutes. Stretch each ball on a floured peel, add toppings sparingly, and bake for 6–9 minutes, until the crust is blistered and the bottom is crisp.
Hydration levels compared — and which one to pick
Hydration (water weight divided by flour weight) changes everything. Here’s a quick reference based on my own trials:
| Hydration | Water per 320g flour | Difficulty | Crust character | Best for |
|---|---|---|---|---|
| 55% | 176g | Easy | Dense, cracker-like | Pan pizza, beginners |
| 60% | 192g | Easy | Balanced, slightly chewy | Everyday home oven pizza |
| 62% | 198g | Moderate | Open crumb, crisp exterior | My go-to (this recipe) |
| 65% | 208g | Challenging | Airy, tender, harder to shape | Experienced bakers |
| 70%+ | 224g+ | Advanced | Very open, custardy center | High-heat ovens only |
I’d avoid going above 65% unless you have a very hot oven (like a dedicated pizza oven) and some practice with wet doughs. In a home oven, high hydration can lead to a soggy middle because the bake is too slow.
The proofing mistakes even seasoned bakers miss
Cold ferment is forgiving, but there are a couple of subtle traps.
First: don’t let the dough over-proof in the fridge. If you leave it for five days, the gluten breaks down and the dough turns slack and soupy. It’ll still bake, but the structure is weak. I’ve pushed it to 72 hours with good results; beyond that, it gets dicey.
Second: watch the room-temperature proof. After the cold ferment, the dough balls need to relax and warm up. If your kitchen is cool (below 20°C), give them 2 hours. If it’s warm (above 24°C), 45 minutes might be enough. The dough is ready when it feels soft and slightly jiggly, and a gentle poke leaves an indentation that springs back slowly. If it springs back fast, it needs more time. If it doesn’t spring back at all, it’s over-proofed — bake it anyway, but expect a flatter crust.
Common questions (and non-obvious answers)
I’ve tested these ratios and methods in my own kitchen over many batches. The times and temperatures reflect my experience with a standard home oven and a baking steel. Your results may vary slightly with different equipment, but the principles hold.



Comments
Share your experience